Saturday, July 31, 2021

Samsung Galaxy Book Go review: Crazy value at a crazy price

XDA Recommended Product in 2020 Award Badge
I can’t tell you how excited I was to write this review. When Qualcomm announced its Snapdragon 7c chipset back in December 2019, it really piqued my interest. It promised the traditional value propositions like integrated cellular connectivity, thinner and fanless designs, and better battery life, but at a price point that most certainly wasn’t traditional. The sub-$500 laptop market isn’t a good one, and has few products I can recommend, but the Samsung Galaxy Book Go offers things that others don’t.

When Snapdragon 7c devices first started shipping, they were in educational devices, and later, on Chromebooks like the Acer Chromebook Spin 513. Now, the Snapdragon 7c Gen 2 is here in the Galaxy Book Go. Like the Snapdragon 8cx Gen 2, the new chipset is only a clock speed bump over its predecessor.

The Samsung Galaxy Book Go, unfortunately, sheds integrated cellular connectivity in the base model, but the rest is there. It’s a fanless PC that weighs in at three pounds. Indeed, that’s not something you see on a laptop that only costs $349. There are 4G LTE and 5G tiers as well.

Navigate this review:

Samsung Galaxy Book Go specs

Processor Qualcomm Snapdragon 7c Gen 2, 2.55GHz
Graphics Qualcomm Adreno
Body 12.75″x8.85″x0.59″, 3.04 pounds
Display 14 inches, 1,920×1,080, 220 nits, LED
RAM 4GB LPDDR4x
Storage 128GB eUFS
Battery 5,480mAh, 2-cell Li-ion
Ports (2) USB 3.1 Type-C
(1) USB 2.0 Type-A
(1) 3.5mm audio
MicroSD card reader
Audio 2 x 1.5W Dolby Atmos
Webcam 720p
Wireless Bluetooth 5.1, 802.11ac
Material Plastic
Color Silver
OS Windows 10 Home
Price $349.99

This model was provided to me by Qualcomm, and it’s the base model. There are going to be more variants, such as the 5G model with a Snapdragon 8cx Gen 2.

Design: The Samsung Galaxy Book Go looks and feels premium

As far as design goes, the Samsung Galaxy Book Go looks and feels like a premium device.

I’ve reviewed hundreds of laptops in my career, and many of them are meant to be entry-level. All of those have a common theme though. They’re a lot thicker and heavier than premium devices. Indeed, they often offer the same Core i5 or even the Core i7 that you’d get in an ultrabook, with a solid 8GB of RAM, but you make compromises in other ways.

As far as the design goes with the Samsung Galaxy Book Go, it looks and feels like a premium device. What I mean by that is if I put this on a shelf with a half-dozen premium ultrabooks and convertibles, you probably wouldn’t be able to guess which one costs $349. And when I say it feels premium, I have to say I was surprised when I saw it was made out of plastic. Just by the feel, I thought it was metal.

Rear view of Samsung Galaxy Book Go on wooden bench

The color it comes in is silver, so there’s nothing about it that really stands out. I still like the look a lot better than a gray laptop, like other Samsung laptops. The only marking on the lid is the shiny Samsung logo.

Side view of Samsung Galaxy Book Go

This is actually the first Windows on ARM device that I’ve seen with a USB Type-A port, which is cool. It’s USB 2.0 unfortunately, but you can still use it for connecting basic peripherals like a mouse.

Side view of Samsung Galaxy Book Go

You’ll also find two USB Type-C ports, one on each side. It’s always nice to be able to choose which side to plug a charger into. On the left side, there’s also a 3.5mm audio jack and a microSD card slot, so the ports really do check the right boxes.

Display: The 14-inch FHD screen

While it’s impressive that a PC at this price has an FHD resolution, the screen is where you’ll start to remember how much the Galaxy Book Go costs. Frankly, it’s just not good. There’s noticeable color distortion if you try to look at it from any angle, and it screams budget PC.

Front view of Samsung Galaxy Book Go display

As you can see from my testing, the color gamut isn’t impressive at all.

Screenshot of Samsung Galaxy Book Go display testing

There’s no touch, which is no surprise given this is a clamshell laptop instead of a convertible. The bezels are about what you’d expect, narrow on the sides and larger on top to make room for the webcam. Sadly, that webcam is 720p, although again that’s not surprising given the price.

Close up of Samsung Galaxy Book Go webcam

One thing that’s surprisingly good is audio quality. The two 1.5W speakers are placed on the bottom of the device and they support Dolby Atmos. Listening to music on this machine is a much better experience than I’d expect.

Keyboard: It’s a standard Chiclet-style keyboard

One of the biggest pain points of this machine is the display, but the rest of it is pretty good. The Chiclet-style keyboard obviously isn’t winning any awards – it’s not an HP EliteBook or a Lenovo ThinkPad – but it’s solid. For the price, it’s pretty good and I have no complaints.

Top down view of Samsung Galaxy Book Go keyboard

As you can see from the image above, there’s nothing that stands out here. It’s your standard black keys on top of a silver deck. Above the keyboard is the power button, which sits flush with the deck; however, it’s not a fingerprint sensor. Indeed, any Windows Hello biometric authentication isn’t happening here. That’s a sacrifice made to get to the price, and a reasonable one.

Close up of Samsung Galaxy Book Go touchpad

The touchpad is nice and big, at least big enough given the amount of real estate. The whole input experience is pretty good, or at least there isn’t anything bad about it. I’ve had laptops that cost two or three times as much with keyboards that are awful. I’d call this a win.

Performance: The Snapdragon 7c Gen 2 doesn’t get help from 4GB RAM

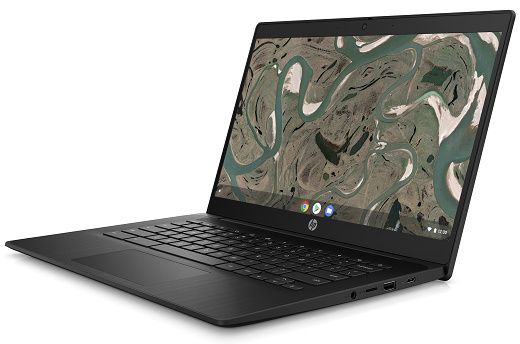
Like the Snapdragon 8cx before it, the Snapdragon 7c Gen 2 is a 150MHz improvement in clock speed over its predecessor. It’s designed for the entry-level, including Chromebooks and the educational market. Samsung is the first to put a Snapdragon 7c in a Windows-based consumer laptop.

It does feel sluggish in every day use, and for the most part, I use native apps. The bulk of my work is done in Microsoft’s Edge browser, which is native to ARM64. Other apps include Skype, OneNote, and Slack, the latter of which runs in emulation.

To be clear, Windows on ARM can run native ARM64 apps and emulated 32-bit x86 apps. There is x64 support coming with Windows 11, and in fact, I did install the Windows 11 preview about halfway through my testing process, just to see how much the experience improves. Indeed, Windows 11 does include various improvements for ARM PCs.

Samsung Galaxy Book Go closed on a bench

It doesn’t get much better with Windows 11, because there’s only so much you can ask for here. If you want to look across the board at the Intel Pentium Silver or Celeron processors that you’d expect at this price point, performance doesn’t really get any better. In fact, it’s probably worse.

What’s really the bottleneck here is that the Samsung Galaxy Book Go only has 4GB RAM. Windows PCs in 2021 need more than that. If you’ve got a lot of tabs open in the browser, you’re going to find that it has to reload pages from time to time.

On the other hand, Adobe Photoshop was surprisingly smooth. Of course, that’s another app that runs natively these days, along with Lightroom. Unfortunately, Adobe doesn’t offer 32-bit apps for emulation anymore, nor can you get the x64 apps through the Creative Cloud apps. In other words, your only options for Adobe apps are Photoshop and Lightroom.

Honestly, I think 8GB of RAM would completely change the experience for the Galaxy Book Go. There are supposed to be configurations for that, but right now this is the only one on Samsung’s website. In short, the chipset is pretty good for this price point, but 4GB RAM simply isn’t enough.

It’s worth remembering this is a really low price point. I say that because even people that buy inexpensive laptops might not realize how little you get for $350. This is normally a tier I wouldn’t recommend to anyone.

For benchmarks, I only used Geekbench, since that’s all that’s natively supported on ARM. Unfortunately, it doesn’t paint a full picture. Geekbench tests are for the CPU, but Qualcomm’s SoCs are a lot more than that, including the Adreno graphics and the DSP, which combine for the AI Engine.

Samsung Galaxy Book Go
Snapdragon 7c Gen 2
Microsoft Surface Go
Pentium Gold 4415Y
Huawei MateBook E
Snapdragon 850
Lenovo ThinkPad X1 Fold
Core i5-L16G7
Samsung Galaxy Book S
Snapdragon 8cx
Geekbench 561 / 1,626 401 / 909 494 / 2,045 510 / 1,727 726 / 2,909

Battery life is fine, but it doesn’t live up to what I expect from Windows on ARM. After all, that’s supposed to be one of the key value props. I only got about six hours of real-world usage. Sometimes it was a bit better, but with a full-sized laptop, I expected more. For example, the Lenovo Flex 5G got over 12 hours for me.

Conclusion: Should you buy the Samsung Galaxy Book Go?

The Samsung Galaxy Book Go would be my pick if you’re looking to spend $349.

Now for the big question. Should you buy it? The answer is, it depends. It all depends on how much you’re willing to spend on a laptop. When people ask me for laptop recommendations, my first question is what their budget is. Sometimes they say something crazy like $200. Others are more reasonable, and like I said earlier, I normally don’t recommend anything that costs under $500. But if $349 is what you’re looking to spend, the Samsung Galaxy Book Go would be my pick.

Front view of Samsung Galaxy Book Go on a bench

There’s just a lot of value here, and it feels so premium. When I first took it out of the box, I actually said “wow” out loud, because I totally didn’t expect what I got. The build feels great, and that’s made possible by the Snapdragon chip.

It’s not perfect, of course. The display isn’t great, but again, this price point doesn’t get you a great display. The bigger issue is it only has 4GB RAM. To put it simply, you’ll need more, but of course, that means paying more.

All around, the Samsung Galaxy Book Go is a phenomenal value. It’s got a design that’s unheard of for the price, and the overall experience is pretty good.

    Samsung Galaxy Book Go
    Samsung's Galaxy Book Go is an entry-level laptop with a Qualcomm processor and a unique value proposition

      Features:

      Pros:

      Cons:

The post Samsung Galaxy Book Go review: Crazy value at a crazy price appeared first on xda-developers.

The Ultimate Guide to AirDrop on iPhone and Mac: Everything you need to know about the super convenient file transfer solution

AirDrop is Apple’s file-sharing feature that allows you to easily transfer files among Apple devices. It’s arguably one of the most seamless offline file transfer methods around, and it removes the need to upload your files to the cloud and then download them onto another device. It works on all modern Apple iPhones, iPads, and Macs.

In this article, we’ll talk about everything you need to know about AirDrop, and how you can use it.

Navigate this guide:


What is AirDrop?

AirDrop UI

AirDrop is a proprietary file-sharing feature from Apple. It uses an ad-hoc Wi-Fi connection to transfer photos, videos, documents, websites, map locations, and a lot more to other Apple devices. Moreover, it doesn’t require any setup, and can automatically detect other Macs or iPhones that are using AirDrop. The feature works completely offline and doesn’t need any kind of internet connection.

History

AirDrop made its debut as a part of Mac OS X Lion back in 2011. But it didn’t arrive on iOS until 2013 when it was added to the iPhone operating system as a part of iOS 7. Even then, the macOS AirDrop protocol and iOS AirDrop protocol weren’t interoperable.

The AirDrop protocol present in Mac OS X Lion, Mountain Lion, and Mavericks only used Wi-Fi, whereas the iOS AirDrop protocol uses both Bluetooth and Wi-Fi. So to make AirDrop interoperable on both its platforms, Apple added support for iOS AirDrop protocol to OS X Yosemite. However, the legacy Mac AirDrop protocol is still used to transfer files between a Mac running OS X Lion, Mountain Lion, or Mavericks and another Mac running macOS Mojave or an older version.

Apple finally removed the legacy AirDrop protocol in macOS Catalina. Now, the iOS AirDrop protocol is used to transfer files among all modern iPhones, iPads, and Mac computers.

How does AirDrop work?

AirDrop in Finder

The iOS AirDrop protocol (which we’ll just refer to as AirDrop from now on) uses both Bluetooth and Wi-Fi to identify nearby devices (within 30 feet) and transfer content. It employs Bluetooth to detect any compatible devices in the vicinity. When a compatible nearby device is selected for a file transfer, AirDrop creates a peer-to-peer Wi-Fi connection to complete the actual transfer.

Since it uses a peer-to-peer connection, the two devices don’t need to be on the same Wi-Fi network. You can be anywhere with or without internet, as long as you have Bluetooth and Wi-Fi working on both devices. There’s no file size limit either. So you can transfer files as large as you want, given there’s enough space on the recipient device. You can also share pretty much everything between devices.

For data security, AirDrop uses TLS encryption over the peer-to-peer network, so your data is secure as well as private. It also creates a firewall between devices, so no one can access your phone or computer over the connection.

Which devices work with AirDrop?

AirDrop can work with iPhones, iPod touch, iPads, and Macs. The iPhones and iPads need to be running on iOS 7 or newer. To use AirDrop on Mac, you must have the 2012 or newer model (except the 2012 Mac Pro). In the case of the Mac Pro, you should have the 2013 or newer model.

As explained earlier, the older Macs can use the legacy AirDrop, but only if they’re running on macOS Mojave or older, and are airdropping files to another Mac running Mac OS X Lion to Mavericks. Macs running any macOS version older than Lion don’t come with AirDrop, and the legacy AirDrop was dropped in macOS Catalina. So there are very few combinations where legacy AirDrop still works.

Moreover, AirDrop can only be used with Apple devices. There’s no support for Windows or Android. Android has its own AirDrop alternative called Nearby Share. We’ll talk about it later in the article.

How to use AirDrop

Turning it on or off on iPhone or iPad

iPhone control center iPhone control center - airdrop iPhone AirDrop options

You can enable the AirDrop feature for just your Contacts or Everyone on iPhone or iPad, or set it to Receiving Off to disable it.

  • To enable AirDrop, open Control Center on your iPhone or iPad. Depending on your iPhone model, Control Center can be opened by swiping up from the bottom edge or swiping down from the top right corner of your screen.
  • Once Control Center is open, long press on the Wi-Fi button or anywhere in the network settings card, and you’ll see a number of connections-related options, including AirDrop.
  • Tap on it to select from Receiving Off, Contacts Only, and Everyone. Everyone means any random person in your vicinity will be able to send files to you.

Turning it on or off on Mac

Airdrop in Finder AirDrop options in Finder

Similar to iPhone or iPad, you can set AirDrop to No one, Contacts Only, or Everyone on Mac.

  • Open Finder on your Mac.
  • Click on AirDrop in the left Navigation.
  • Under the Allow me to be discovered by dropdown, select No One, Contacts Only, or Everyone.

How to share files from iPhone or iPad

Photos app Share Sheet Contacts Share Sheet AirDrop option in Share Sheet Airdrop transfer done

You can send files using AirDrop from any iOS or iPadOS app that includes the Share Sheet.

  • Open the app from which you’re trying to send something. For example, open the Photos app if you’re trying to share a photo or photos.
  • Select what you’re looking to send and tap on the Share icon.
  • Select the contact or device to which you’re trying to AirDrop the file.

Between iPhones and iPads, you can transfer all sorts of things, including photos, videos, contacts, Passbook passes, Voice Memos, websites, and Map locations.

How to share files from Mac

There are multiple ways to AirDrop files from a Mac. You can drag and drop them, share them using the context menu, or use the share sheet.

How to share files using the context menu

Finder Context Menu

  • Open Finder on your Mac.
  • Locate the file or folder you want to share.
  • Right-click on the file or folder and select AirDrop under the Share option.
  • You can now click on the device or contact to which you want to send the file.

How to share files using the Share button on Mac

Finder Share icon
Apart from the context menu, you can also share files using the Share button.

  • Open Finder on your Mac.
  • Locate and select the file you want to share.
  • Click on the Share button in the option on the top bar.
  • Select the device or contact to whom you want to send that file.

How to share files using drag and drop

Drag and Drop files in Finder

  • Open Finder on your Mac.
  • Locate the file you need to share.
  • Open a new Finder window and select AirDrop from the sidebar.
  • Now you can drag and drop files from the other Finder window to a contact or device in the AirDrop window.

From Macs, you can send documents, photos, videos, websites, map locations, and more to iPhones, iPads, other Macs, and iPod touch.

How to accept AirDrop transfer requests

AirDrop to iPhone and Mac

AirDrop to iPhone (left) and Mac

When someone shares something with you using AirDrop, you’ll see a notification on your Mac or iPhone. The notification will show a preview of what has been shared, and you can accept or decline it. If you accept it, the content will get transferred to your device.

But if you’re getting it on your iPhone, the content will appear in the app compatible with it. For example, the shared photo will show up in the Photos app. The files shared to Macs however get saved in the Downloads folder.

If you’re sharing something to yourself, such as from your iPhone to your Mac, you don’t need to accept the transfer. Everything will automatically get transferred, given you’re using the same Apple ID on both devices.

How to troubleshoot AirDrop problems

To make sure AirDrop works without a hitch, check that both devices fulfill the following conditions:

  • Both devices are unlocked and within 9 meters of each other.
  • Both have Bluetooth and Wi-Fi turned on.
  • The Personal Hotspot feature is turned off on each iPhone.
  • Each Mac was introduced in 2012 or later (except the 2012 Mac Pro) and runs on OS X Yosemite or newer. Some older Macs can use the legacy AirDrop — you can read about them in the “Which devices work with AirDrop” section.
  • The iPhone, iPad, or iPod touch is running on iOS 7 or newer.
  • Both devices can receive AirDrop requests.
  • Block all incoming connections is not enabled in Mac > System Preferences > Security & Privacy > Firewall.
  • If AirDrop discoverability is limited to Contacts Only, make sure both of you are signed into iCloud and have each other in your contacts section with Apple ID email address and mobile number.
  • While sending files on an older Mac with legacy AirDrop, make sure the recipient has the AirDrop window open.
  • If you’re getting random AirDrop requests, change the option to Receiving off/ No one or Contacts Only on your iPhone or Mac.

Alternatives on iOS

Given AirDrop’s deep integration on Apple devices, all third-party AirDrop alternatives fall short on ease of use and overall functionality. But if you’re still somehow having trouble with AirDrop, or are looking to share something outside of Apple devices, the following are decent alternatives to AirDrop.

Xender

Xender is a cross-platform file transfer app that allows you to share photos, documents, music, videos, and other types of files. The app can be used on iOS, Android, and any device with a web browser, including Mac and PC. It uses peer-to-peer Wi-Fi to transfer files, so you don’t need internet access.

    Xender
    Xender is free to download and use.

AirDroid

AirDroid is similar to Xender in a lot of aspects but it packs far more features. You can transfer files both over peer-to-peer Wi-Fi and the internet. AirDroid is free to download and use, but there are some limitations in the free version.

    AirDroid
    AirDroid is a decent file sharing app that packs a lot of features.

Nearby Share: Android’s AirDrop alternative

Years after AirDrop was introduced on iOS, Google launched its own alternative in the form of Nearby Share in 2020. Nearby Share works on all phones running Android 6.0 or newer. Unlike Apple’s solution that only works offline, Nearby Share can share content both offline and online. It uses Bluetooth, Bluetooth LE, WebRTC, and peer-to-peer Wi-Fi protocols to share content, and automatically chooses the best protocol when you’re sending something. Apart from Android, Nearby Share can also be used with Chromebooks.

Nearby Share can be accessed in the Share menu on Android phones, and you can use it like any other share option. It isn’t the only file transfer service on Android but it’s something that works across devices and manufacturers.

If you’re looking to transfer files between an Android device and a Windows computer, check out our guide on How to Transfer Files between Android and Windows PC.


This is everything you need to know about AirDrop. Do you know of any great alternatives to it? Let us know in the comments section. Meanwhile, if you’re in the market for a new laptop or a smartphone, our best phones and best laptops buying guides can help. Also, we have a great tutorial on how you can use split-screen on Mac.

The post The Ultimate Guide to AirDrop on iPhone and Mac: Everything you need to know about the super convenient file transfer solution appeared first on xda-developers.

Friday, July 30, 2021

Get three Google Nest Mini smart speakers for just $65

Google finally replaced the original Nest Mini smart speaker (originally called the Google Home Mini) in late 2019, with the arrival of the 2nd-gen Nest Mini. The updated model looks almost identical, but it packs better sound, wall mounting support, and different manufacturing materials. It normally costs $30-35 (even though MSRP is $50), but you can now get three of them in a pack for just $64.99.

The Nest Mini is a smart speaker with Google Assistant, so you can use voice commands to stream music, ask questions, play news reports, set reminders and alarms, manage calendar events, and more. It also functions as a Chromecast target, so you can ‘cast’ audio to the speaker from supported apps on your local Wi-Fi network. For everything else, the Nest Mini can pair as a Bluetooth speaker.

    Google Nest Mini (3-Pack)
    Buydig is selling 3-packs of Nest Mini speakers through its eBay store for $64.40.

The new Nest Mini isn’t much of an upgrade over the older Google Home Mini, but if you need smart speakers in more rooms, or if you’re migrating an Alexa-dominated household over to Google Assistant, this is a much cheaper way to get multiple Nest Minis at once.

The post Get three Google Nest Mini smart speakers for just $65 appeared first on xda-developers.

This exploit lets you unlock the bootloader of the Google Chromecast with Google TV

The Google Chromecast with Google TV is one of the best media streaming dongles out there. The little piece of hardware not only unlocks 4K video streaming at 60fps for connected devices, but it also brings support for HDR content, Dolby Vision, and Dolby Atmos audio. The device can even be considered a capable gaming console thanks to receiving official support for Google’s Stadia cloud gaming service. Now, developers have been able to successfully unlock its bootloader, opening up even more possibilities.

Unlike with the Pixel smartphone lineup, Google doesn’t offer an official bootloader unlock method for the Chromecast with Google TV. As a result, the modding community had to rely on security vulnerabilities to craft an unofficial bootloader unlock method. In a recent forum post, security researchers Nolen Johnson and Jan Altensen, AKA XDA Recognized Developers npjohnson and Stricted respectively, highlighted the exploit chain used to unlock the bootloader of the Google Chromecast with Google TV. The method, which makes use of a bootROM bug in the Amlogic SoC originally discovered by another security researcher by the name of Frederic Basse, requires you to boot the dongle to Amlogic’s USB burning mode and then boot a set of modified bootloader images.

To begin with, the target Chromecast with Google TV unit must be manufactured before December 2020 and the running firmware version needs to be below the February 2021 patch level. This is because newer units come with a bootROM password protection mechanism, and Google enabled a similar mitigation policy on older units in the February 2021 software update.

If your device is vulnerable, then you’ll have to unplug it from the HDMI port and trigger the Amlogic USB burning mode by holding down the button on the rear of the device while plugging the USB-C end of a USB-A to USB-C cable into the dongle. The unlocker script, which communicates with the target through the libusb-dev library, requires a 64-bit Linux environment.

In a nutshell, the process involves downloading the unlocker suite, connecting the Google Chromecast with Google TV to a PC running Linux with a USB cable, and running a shell script that executes the exploit chain. Booting the modded bootloader essentially modifies the contents of the /env partition and puts the device in a state where it’s capable of ignoring the anti-rollback check and the signature on the U-Boot in order to declare itself as bootloader-unlocked. For more details, you can read the full writeup from Nolen Johnson and Jan Altensen at the GitHub repo linked below.

sabrina-unlock: Bootloader unlock for the Chromecast with Google TV

An unlocked bootloader is key to boot an aftermarket operating system, and you won’t have to wait long before you can flash a custom ROM onto it. Johnson says that LineageOS builds are coming soon for the Chromecast with Google TV (Johnson is listed as a “trusted reviewer” and contributor to LineageOS). In case you want to try something else, then you’ll be happy to know that Frederic has already booted Ubuntu Linux from an external USB flash drive.

Since the process is a bit tricky and requires devices manufactured before a certain timeline, it’s safe to say that the exploit isn’t meant for beginners and will most definitely void the warranty. Nonetheless, it is possible re-lock the bootloader by flashing a stock firmware package crafted by the developers. As a precautionary measure against forced updates, you’re advised to block Google’s OTA servers via your router’s DNS settings, and if possible, get rid of the “SetupWraith” application from the stock firmware. Users are also advised to steer clear of Magisk for now, because patching the stock boot image with Magisk will soft-brick the system.

Chromecast with Google TV Bootloader Unlock — XDA Discussion Thread

The post This exploit lets you unlock the bootloader of the Google Chromecast with Google TV appeared first on xda-developers.

Apple iPad Pro 12.9-inch (M1) vs Microsoft Surface Pro X: Battle of the best ARM tablet

Apple has been pretty adamant about how the iPad Pro is an excellent laptop replacement, especially the new 2021 model powered by its M1 chipset. This is the same processor Apple currently uses on the MacBook Pro 13, MacBook Air, Mac mini, and the 24-inch iMac. The latest iPad Pro offers ample storage options, lots of memory, support for 5G connectivity, and a brand new mini-LED display.

On the other side of the spectrum, we have Microsoft with the Surface Pro X, the first and only tablet from the company running on an ARM chipset made by Qualcomm and running full-fledged Windows 10.

If you’re looking for a reliable productivity tablet, there are many similarities between these two. Both offer a 13-inch display, run on ARM chipsets, and you can get them with an optional keyboard and stylus accessories. But which one is the better option?

Apple iPad Pro 12.9-inch (M1) vs. Microsoft Surface Pro X: Specifications

Apple iPad Pro 12.9-inch (M1) Microsoft Surface Pro X
CPU
  • Apple M1 chip (8-core ARM CPU, 16-core Neural Engine)
  • Microsoft SQ1 (Up to 3GHz, 8 cores)
  • Microsoft SQ2 (Up to 3.15GHz, 8 cores)
Graphics
  • 8-core GPU
  • Qualcomm Adreno 685
  • Qualcomm Adreno 690
Body
  • 280.6×214.9×6.4 mm (11.04×8.46×0.25 inches)
  • 682 g (1.50 lbs)(Wi-Fi)
  • 685 g (1.51 lbs) (5G)
  • 287×208×7.3 mm (11.3×8.2×0.28 inches)
  • 774 gms (1.7 pounds) without keyboard
Display
  • 12.9-inch Liquid Retina XDR mini-LED backlit IPS
  • 2732×2048 resolution, 120Hz ProMotion, True Tone
  • 1000 nits max full-screen brightness, 1600 nits peak brightness (HDR)
  • Supports Apple Pencil (2nd generation)
  • 13-inch PixelSense (2880×1920)
  • 267 PPI
  • 3:2 aspect ratio
  • 10 point multi-touch
Ports
  • Thunderbolt 4 with USB4 Type-C
  • 2 x USB-C
  • 1 x Surface Connect port
  • Surface Keyboard port
  • 1 x nano SIM
Storage
  • Up to 2TB
  • Up to 512GB
RAM
  • 8GB/16GB
  • Up to 16GB LPDDR4x RAM
Battery
  • 40.88Wh
  • 18W USB Type-C power delivery
  • Up to 15 hours of typical device usage
Audio
  • 5 microphones
  • Quad speakers
  • Dual far-field Studio Mics
  • 2W stereo speakers with Dolby Audio sound
Camera
  • Front: 12MP ƒ/2.4 aperture, up to 1080p HD video recording,
    Portrait mode, Lens correction, Auto image stabilization, Retina Flash, Smart HDR 3,
    FaceID
  • Rear: 12MP ƒ/1.8 aperture wide, 10MP ƒ/2.4 aperture ultra-wide,
    2x optical zoom, 5x digital zoom, up to 4K video recording, Smart HDR 3,
    Auto image stabilization, True Tone flash, Sapphire crystal
    lens cover, Lens correction (Ultra Wide)
  • 5MP front-facing camera with 1080p full HD video
  • 10MP rear-facing autofocus camera with 1080p HD and 4k video
  • Windows Hello face authentication camera (front-facing)
Connectivity
  • Wi-Fi 6
  • Bluetooth 5
  • Optional 5G
  • Wi-Fi 5: 802.11ac compatible
  • Bluetooth 5.0
  • Qualcomm Snapdragon X24 LTE model
Color
  • Silver
  • Space Gray
  • Matte Black
  • Platinum
Price
  • Starting at $799
  • Starting at $999

Design: Surface Pro X offers more ports and comes with a kickstand

The iPad Pro 2021 continues to have a similar design as last year, with a slim aluminum chassis, a square camera bump at the back, and fairly thin bezels. The Surface Pro X also comes with an aluminum finish and is quite a sleek device offering almost the same thickness (0.25 vs. 0.28 inches) as the iPad Pro and weighing only a tad bit more (682 vs. 774 grams). It has a single camera at the back which, just like the Surface Pro 7, is flushed with the main body, so there’s no camera bump. Like all Surface tablet devices, the Surface Pro X comes with a built-in kickstand allowing you to prop up the tablet on a desk without the need for an additional case or accessory.

If you keep the two tablets side by side, you’ll notice both offer different screen aspect ratios; so the iPad Pro has a taller-looking display. The iPad also has flat edges compared to the rounded-off edges on the Surface Pro X. Another thing you should know is the bezels on the Surface aren’t consistent, as the top and bottom ones are thicker, while they’re slimmer on the sides.

Surface Pro X and iPad Pro on balcony

Things get interesting when it comes to the port selection on these two tablets. The Surface Pro X offers two USB-C ports on the left and a Surface Connect port on the right. This means you get more than one connectivity option on the Surface, besides having the ability to use adapters, dongles, or even a dock. On the other hand, the iPad offers all of that bandwidth through a single USB-C port with support for Thunderbolt.

Additionally, if you go for Apple’s Magic Keyboard for the iPad Pro, an extra USB-C port is built into the spine of the keyboard case that can only be used for passthrough charging. Both tablets skip on the headphone jack, which is a huge bummer.

The Surface Pro X offers the option of upgrading the internal SSD, and while getting your hands on an M.2 2230 SSD is not that easy, it’s still better than the fixed storage options you get on the iPad.

To sum it up, both tablets offer an excellent design. The Surface Pro X is undoubtedly more practical thanks to the built-in kickstand and wider port selection, but the iPad gets all the points for being lighter, slimmer, and being a very minimalistic device.

Display: Liquid Retina XDR display on the iPad Pro is unbeatable

The display size is more or less the same on both the iPad Pro and Surface Pro X. However they come in different aspect ratios. The iPad comes with a 4:3 ratio, while the Surface has a 3:2 ratio. Neither of them feels out of place, although the iPad does look taller. Of course, the real difference is when you compare the panel itself, and that’s where the iPad Pro shines, quite literally.

Angled view of iPad Pro and Surface Pro X display

Apple is using a mini-LED-based display on the iPad Pro, specifically the 12.9-inch model. The new ‘Liquid Retina XDR’ offers 1,000 nits maximum full-screen brightness, which can go up 1,600 nits peak brightness with HDR. This makes it one of the brightest displays on a tablet today, allowing you to easily view content even under the harshest sunlight. The display also supports Apple’s ProMotion feature, which can automatically switch over to a 120Hz refresh rate for a smooth experience.

In comparison, the 13-inch display on the Surface Pro X comes with a 2880×1920 resolution meaning it offers equally good pixel density, but it’s a 60Hz panel that can only go up to 450 nits peak brightness.

Keyboard and stylus: Surface Pro X Keyboard offers better functionality

Side view of iPad Pro keyboard Side view of Surface Pro X keyboard Surface Pen, Apple Pencil, and Slim Pen

The Surface Pro X and the iPad Pro have their own respective keyboards and stylus. Sadly they don’t come bundled with either of them, which means you need to spend extra money for a keyboard and stylus if you’re planning to buy the new iPad Pro or Surface Pro X. You can either go for the Apple Smart Keyboard Folio for the 12.9-inch iPad Pro that costs $199, or if you’re looking for a proper laptop experience, you need to invest in the Magic Keyboard, which costs $349. The iPad Pro also supports the 2nd-gen Apple Pencil, which is available for $129.

The Magic Keyboard for the iPad Pro gained a lot of attention during its launch last year with its floating screen design. It looks really cool, allowing you to snap the iPad using strong magnets inside the upper portion of the keyboard case. But there are limitations. First and foremost, the display angle is limited compared to what you get on the Surface Pro X, thanks to its kickstand. On top of that, the entire weight of the tablet rests on the top half of the keyboard, which makes the entire setup a bit wobbly, especially if you don’t have a flat desk.

The Apple Pencil is currently the most versatile stylus you can have on a tablet. It goes beyond doodling and scribbling notes by letting you convert handwriting into text almost anywhere on UI using Scribble, switching between tools by double-tapping, various gestures, wireless charging, tilt and pressure support, and a lot more.

The standard Surface Pro X Keyboard is priced at $140 and is very similar to the Surface Pro Type cover for the Surface Pro 6/7, having a slim profile, backlit keys, and magnets that help you easily snap onto the tablet. If you can spend a little extra, the Surface Pro X Signature keyboard offers a black Alcantara fabric and a pen garage for you to stow the stylus.

Microsoft redesigned the stylus for the Surface Pro X, which is now smaller and has a flat design. The $145 Surface Slim Pen can also charge wirelessly using its own charging cradle or when you store it in the Surface Pro X Signature keyboard. The features for the stylus are pretty similar to what you can expect from most of the options out there available on Windows; however, the next Windows 11 update is expected to bring some new, well-needed upgrades.

The typing experience shouldn’t be an issue on either of the keyboards, and you should quickly adapt to the layout. Having said that, the keyboard for the Surface Pro X is not only cheaper but easier to handle as well. The Magic Keyboard is undoubtedly unique and offers an additional USB-C port, but function matters over form at the end of the day. I also recommend checking out the Logitech Combo Touch keyboard case, which is comparatively cheaper than Apple’s Magic Keyboard, and completely transforms the iPad Pro into a Surface-like device.

When it comes to pen support, the Apple Pencil is a clear winner as it offers a wide range of features, but note there’s no dedicated cradle, like the Surface Slim Pen, unless you invest in a third-party case.

Performance: The M1 Silicon is superior to the Microsoft SQ2

The Surface Pro X is one of the only Microsoft products that’s powered by an ARM processor. The company partnered with Qualcomm to build custom SoCs (system on chip) called the SQ1 and SQ2, which are basically the same as the 1st-gen and 2nd-gen Qualcomm Snapdragon 8cx chipsets. You can check out some of the best native apps for Windows on ARM.

The SQ2 chip model was announced last year and comes with the big-little architecture, having four CPU cores clocked at 3.15GHz, while the other four are clocked at 2.42GHz. You can configure it with 16GB of RAM and up to 512GB SSD, which is user-replaceable.

The new iPad Pro runs on Apple’s M1 chipset, which is also based on the ARM architecture; however, there are no limitations regarding app support. As mentioned before, this is the same chip Apple now uses to power the MacBook Pro 13, the MacBook Air, Mac mini, and the new 24-inch iMac. It’s based on the 5nm node featuring an octa-core CPU, an octa-core GPU, and a 16-core neural engine. In terms of memory and storage, the iPad Pro is available with 8GB of RAM on models with 128GB, 256GB, or 512GB of storage, and 16GB RAM on models with 1TB or 2TB storage.

In our comparison of the iPad Pro with the Surface Pro 7, I mentioned the iPad Pro hardware is far superior. At the same time, it’s unfair to compare the performance as both tablets run on different operating systems. Similarly, the Surface Pro X also runs on Windows, and once again it isn’t very straightforward if we were to compare the performance. Of course, benchmark test numbers suggest that the iPad Pro wins by a good margin.

Bottom line

I would reiterate my conclusion from the iPad Pro and Surface Pro 7 comparison. If you’re planning to buy either of these, make sure you think about your core needs. The iPad is a great tablet but not a perfect replacement for a laptop. It has wide app support on a mobile-like ecosystem, offers better cameras, the option of 5G connectivity, and possibly the best pen input you can get. However, the Surface Pro X is better tuned for a laptop experience as it runs on Windows, even though it offers limited support for apps. You’ll feel more familiar while carrying out day-to-day tasks like web browsing, checking emails, editing photos, and so on.

Also, before you make up your mind, check out our roundup of the best Surface PCs from Microsoft and the best iPads on the market.

    Apple iPad Pro 12.9-inch
    The 2021 12.9-inch iPad Pro is powered by Apple's M1 ARM chipset and an all-new Liquid Retina XDR mini-LED display. It can be configured with up to 2TB of storage, 5G connectivity and offers Thunderbolt support.
    Magic Keyboard for iPad Pro 12.9
    The Magic Keyboard for the iPad Pro comes with a floating-screen design, backlit keys and an additional USB-C port.
    Microsoft Surface Pro X
    The Surface Pro X is Microsoft's ARM-based Windows hybrid tablet that's powered by a custom version of the Qualcomm Snapdragon 8cx.
    Surface Pro X Signature Keyboard with Slim Pen
    The Surface Pro X Signature keyboard bundle comes with the Surface Slim Pen and a dedicated cradle to store the stylus.
    Surface Slim Pen
    The Surface Slim Pen is specifically designed for the Surface Pro X as it can be easily stored in the Surface Pro X Signature Keyboard cover, although it offers support for the entire Surface lineup of products.

The post Apple iPad Pro 12.9-inch (M1) vs Microsoft Surface Pro X: Battle of the best ARM tablet appeared first on xda-developers.

Microsoft Edge 92 for Android rolling out with the unified codebase

Following the release of Microsoft Edge 92 for PCs, Microsoft is now giving the same treatment to its mobile browser. This is a major update for Microsoft Edge for Android as it finally unifies the codebase with the PC version. Up until now, the stable version of Microsoft Edge for Android was stuck on Chromium 77. As you would expect, it lagged behind other Chromium browsers in terms of both features and performance. But that changes with Microsoft Edge 92, which, as the name implies, is based on Chromium 92.

With the unification of the codebase (via Techdows), we can expect the mobile browser to receive new features and improvements at a much faster pace. Microsoft Edge 92 is packed with many new features. It now lets you synchronize tabs, passwords, history, bookmarks, favorites, and more across devices when you’re signed in using the same Microsoft account. There’s also a built-in ad blocker powered by Adblock Plus, allowing you to block trackers and annoying ads on all websites. You can find the ad blocker under Settings > Privacy and Security > Block ads. It also gives you the option to allow non-intrusive ads that comply with the Acceptable Ads criteria.

Home screen of Microsoft Edge for Android Microsoft Edge for Android settings page Screenshot button in Microsoft Edge Ad blocker feature in Microsoft Edge for Android Microsoft Edge for Android about page

Similar to Google Chrome, Edge for Android now offers a built-in screenshot tool. When you’re on a webpage, tap on the Share menu, and you should see the screenshot button in the bottom right corner in the sharesheet menu (see the third screenshot above). Elsewhere, the new update revamps the Settings page, lets you send webpages to other devices signed with the same Microsoft account, and adds a page translation feature powered by Microsoft Translator.

The new version has started rolling out on the Google Play Store, but it seems to be a staged rollout as the Play Store listing on my device is still showing the old version. You can hit the Play Store link below to see if it’s available for you. Alternatively, you can grab the latest APK straight from APKMirror.

Microsoft Edge: Web Browser (Free, Google Play) →

The post Microsoft Edge 92 for Android rolling out with the unified codebase appeared first on xda-developers.

Where is the best place to buy the HP Chromebook 14?

If you’re looking for a new Chromebook, there’s a good chance at least one model of HP’s Chromebook 14 is on your list. The Chromebook 14 lineup from HP spans nearly 20 different models, with a range of configurable options and price points. With so many choices, it’s easy to find something that fits your personal description of the ideal Chromebook.

In this guide, we take a look at the top 3 models of the HP Chromebook 14 at the three largest online retailers — HP, Amazon, and Best Buy. To make your purchasing decision easier, we discuss pricing, return policy, and support at each vendor.

Pricing

In general, Amazon tends to have the lowest price on average across most HP Chromebook 14 models. On the other hand, Best Buy runs seasonal sales that often make the big-box giant an appealing option. Around back-to-school time and Christmas, you can find some of the HP Chromebook 14 models for a great price at Best Buy. Keep in mind Best Buy will also price match Amazon, so if you prefer buying locally you can take advantage of this to get the best price.

Of the three options, HP typically doesn’t have the best pricing for general consumers. You might get an occasional discount, but the pricing at HP is typically a bit higher than both Amazon and Best Buy.

However, if you’re a student or teacher, you can take advantage of HP’s education discount program. With the education discount, you can save up to 20% on models of the HP Chromebook 14. This could be the best available deal for a particular device. Be sure to check all three websites to get the best overall price.

Return/exchange policy

Return policy is perhaps the biggest factor to consider when purchasing your new HP Chromebook 14.  Checking out HP’s website, you’ll find they have a 30 day return window with a restocking fee up to 15%. In practice, you can expect to pay the full 15% restock fee on most Chromebook 14 models. This is a fairly big downside to buying directly from HP.

HP.com official return policy

Best Buy has a shorter 15 day return window for Chromebooks, but they don’t have a restocking fee. In addition, if you shop with Best Buy often, you may qualify for Elite or Elite Plus status, expanding your return window to 30 or 45 days respectively.

Best Buy's official return policy

I personally choose to shop at Best Buy for most tech purchases to take advantage of my extended 45 day return window. No restocking fee with 45 days to try out a new device is a great bonus. Plus, it’s nice to have a physical store I can visit for returns or exchanges without waiting to mail the device back.

If you buy from Amazon, you can expect a 30 day return window. Keep in mind you need to buy directly from Amazon.com and not a third-party seller. Amazon doesn’t have a restocking fee. Overall, Amazon has the best return policy if you aren’t a Best Buy Elite or Elite Plus member.

Support

When it comes to support, you would think buying directly from the manufacturer is the best option. While it’s easier to get direct support through the manufacturer warranty if you buy from HP, there are additional support options available at Best Buy and Amazon.

If you purchase from Best Buy, you can add a Geek Squad plan to your purchase and get local support for the life of your Chromebook 14. Amazon also offers their own 2 and 3 year protection plans for a very reasonable cost. In terms of value, the Amazon plan is a better deal if you’re willing to send in your machine to get repaired. Best Buy is a superior option for local service, but you pay quite a bit more for this support.

That’s our comparison of the purchasing options for the HP Chromebook 14 at HP, Amazon, and Best Buy. All three retailers carry numerous models of the Chromebook 14, so you can certainly find many touchscreen options and traditional clamshells as well. Let us know which model of the HP Chromebook 14 you plan to grab.

    HP Chromebook 14
    You can buy all of the latest Chromebook 14 models directly from HP's website.
    HP Chromebook 14
    Amazon is a great option if you have a Prime account. You can also find pre-owned models on Amazon to save a few bucks.
    HP Chromebook 14
    If you want a local store, Best Buy is the best option for your HP Chromebook 14 purchase. The store also has a competitive return policy with no restocking fee.

The post Where is the best place to buy the HP Chromebook 14? appeared first on xda-developers.